Widgets are self-contained blocks of functionality of your Konnectclub platform account that you can embed on your own website as a white-label integration. You simply copy the provided code snippet for each of these widgets and paste it into your Website builder tool, no developer skill is required.
Copy Code Snippet
There are four types of Widgets available. You will copy the necessary code snippet in one of the following ways depending on the Widget you want to embed:
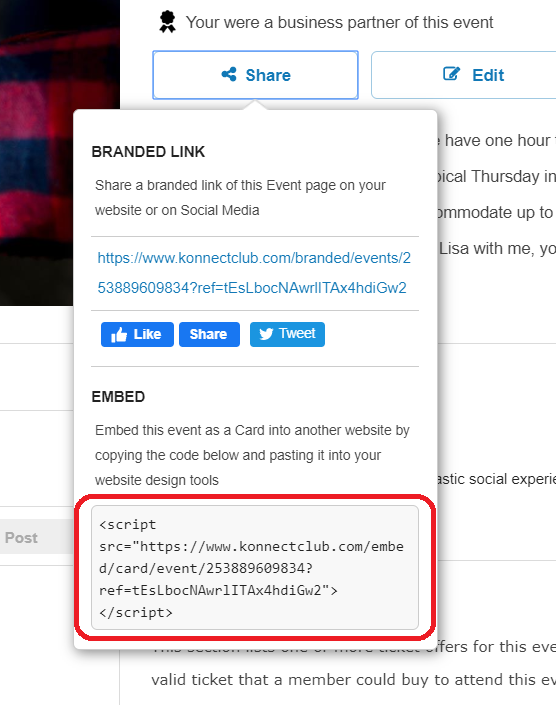
Event Widget
This type of Widget shows up-to-date information summary of an event and the ticket check-out option directly on your website. Full details of the event, including the entire ticket payment flow, is presented as a light-box without leaving your website.
The code snippet for this Widget can be obtained under the “Share” option of each published Event Page under your business account.
Event List Widget
This widget shows a list of events under your account in a chronological calendar format. Events are dynamically ordered based on their closeness to the current date. Each event presents a link target to show additional details and the option to “Get Ticket” via a light-box.
The code snippet for this Widget can be obtained under the “Share” option on top of the Events Tab on your account Dashboard.

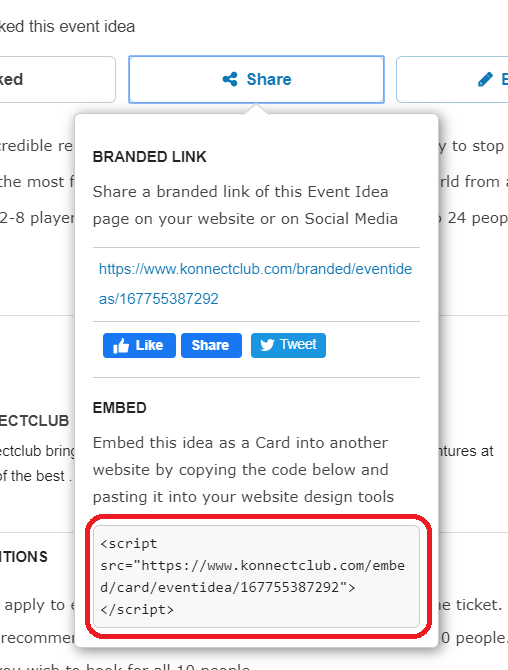
Event Idea Widget
This widget shows the information about an event package and an option to “Book” it directly on your website. Full details of the package and the booking flow is presented as light-box if initiated by the user.
The code snippet for this Widget can be obtained under the “Share” option of each available Event Idea Page under your business account.
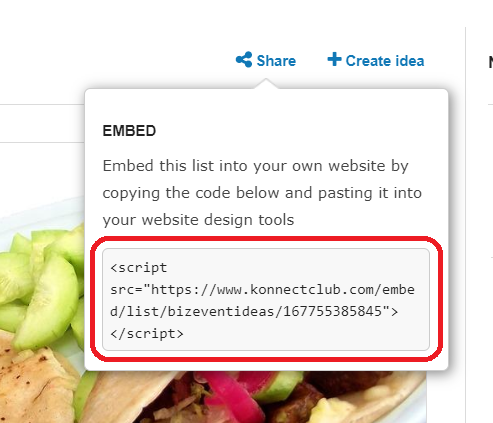
Event Idea List Widget
This widget shows a list of event packages under your business account. Event packages are dynamically ordered based on their popularity. Each event package presents a link target to show additional details and the option to “Book” via a light-box.
The code for this Widget can be obtained under the “Share” option on top of the Ideas Tab on your business account Dashboard.
Paste Code Into Your Website Builder
Now you will paste the code snippet obtained in the previous step. Look for the option to embed external widgets or code-snippets or videos in your specific Website Builder. This is sometimes available in the “source” mode or “code” mode. You must paste the code entirely as you obtained. If you are using one of the following Website Builder tools, please see the linked reference article for specific details:
- Squarespace – Code Blocks
- WordPress – Custom HTML Block
- Wix – HTML Code
- Weebly – External Content
- GoDaddy – HTML Code
- ArtStoreFronts – Embed (follow the process from step 6 onward)
Customize Widget (Advanced)
Each embed Widget can be further customized by adding one or more of the following data-* attributes to the script tag in the code snippet. For example, the following code snippet will use a dark theme, will force the portrait layout regardless of the screen size and will not show the title and the description on the Widget .
<script src="https://www.konnectclub.com/embed/card/event/241373808975"
    data-theme="dark"
    data-layout="portrait"
    data-exclude="title,details"></script>
| Options | Possible Values | Explanation |
| data-theme |
dark, light | Specify dark theme if the hosting page has a dark background. Dark theme will use black background with a white foreground. Default value, when nothing is specified, is light. |
| data-layout |
portrait, landscape | Specify a layout to force that orientation regardless of the screen size. The default mode, when not specified, is responsive and changes depending on the screen width. |
| data-layout-breakpoint |
a number | Specify a pixel value which will force a switch of orientation from portrait to landscape in the auto (i.e. not specified) layout mode. If the available width is smaller than this value, the portrait mode is chosen. Default is 600. |
| data-exclude |
title, image, info, actions, details |
Specify any combination of the possible values separated by comma to exclude the corresponding part from the widget. Default is none exclude. Following diagram shows various parts: 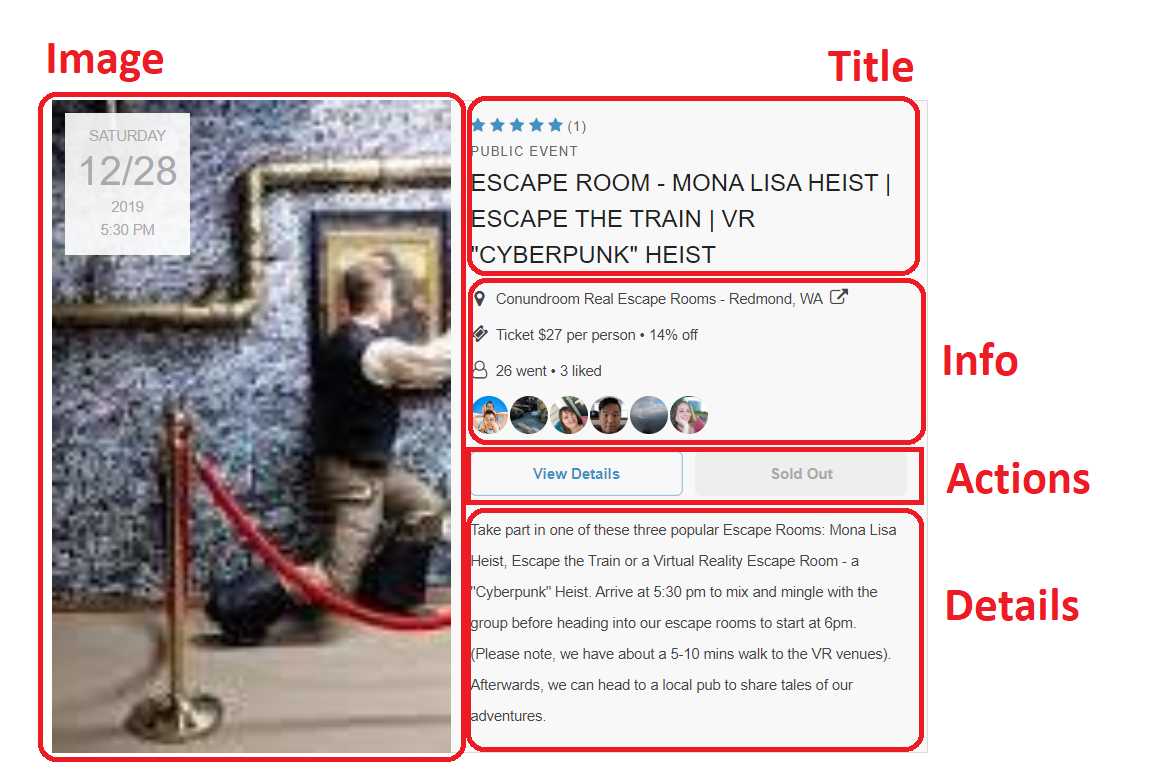 |