If you selected Interactive Live Streaming as your streaming mode, then you will be going live directly from your web-browser. This section describes the setup required and various related features that you can use.
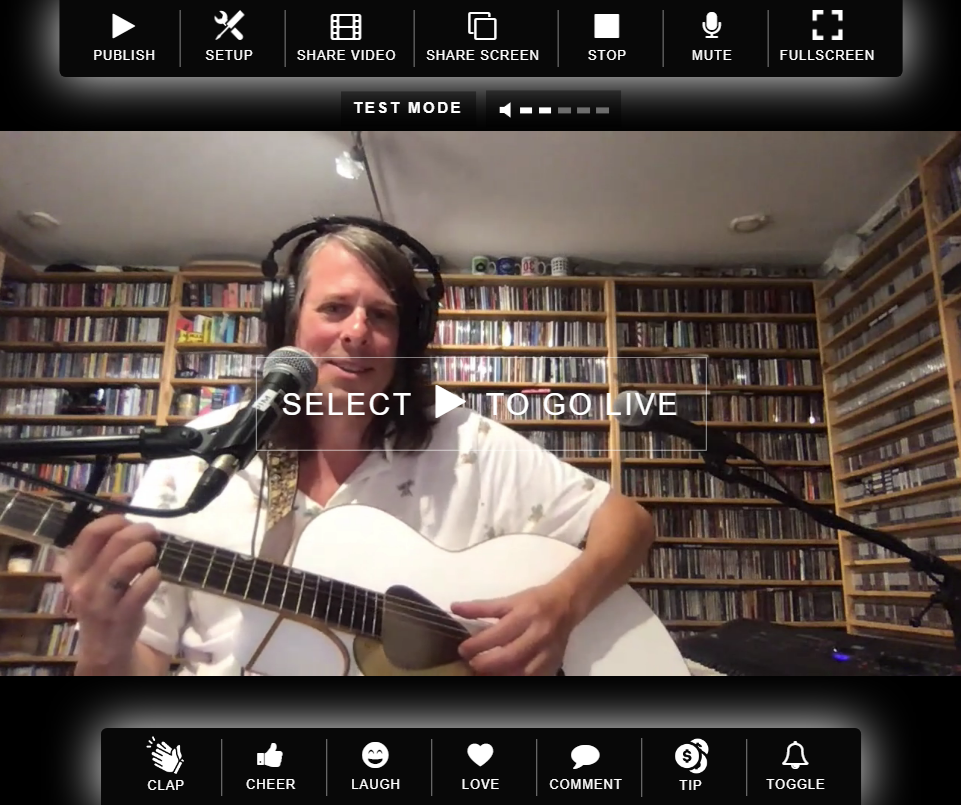
Click Test ➜ Present (in the test mode) or Connect ➜ Present (in the production mode) to access the presenter virtual stage. Your virtual stage would look like the following screenshot with your own live camera feed. At this point, you are in a Preview mode, not broadcasting yet.
Tweak Audio/Video Settings
You can change your A/V settings by clicking the Setup button from the top panel. The setup will show you the following prompt. If you have an audio or video equipment connected to this computer, and if they are recognized as valid devices for your computer, then they will show up in the list.
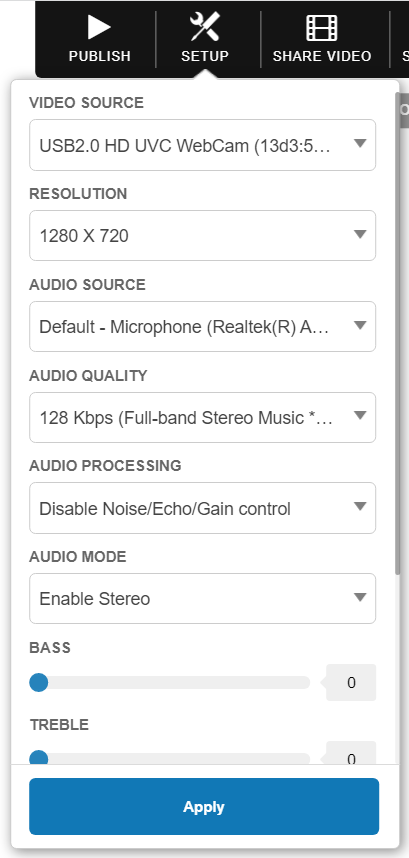
The setup prompt also allows you to select high definition audio bit-rate, stereo mode etc. to enable you to deliver high quality content in real time.
Once you have made your selections on the Setup prompt, click Apply to allow the changes to take effect.
Publish Your Feed
Once you are satisfied with your settings, you can go live by clicking the Publish button on top. At this point, any viewer tuned into the session (either in Test mode or Production mode) will see you live feed.
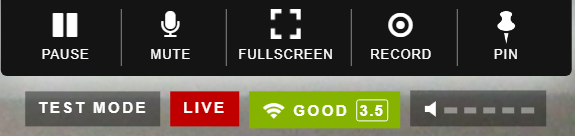
Your virtual stage will show a status of your connection, and number of viewers watching live at any time.
Live Share a Pre-Recorded Video
Instead of broadcasting a camera feed, you can also play the content of a pre-recorded video file for you audience from your virtual stage.

To use this feature, follow the steps below:
- First enter the presentation stage by clicking Test ➜ Present (in the test mode) or Connect ➜ Present (in the production mode).
- Then click the Share Video button from the top command bar. You will see a prompt to select the video file from your disk.
- Once the file has been loaded and a preview is displayed, click Publish to begin streaming the content of the file.
- While the content is streaming, you can change the current position of the video.
- Once the video has been played through to the end, it will automatically stop streaming and your virtual stage will go back to the pre-published state.
- If you wish to switch back to camera feed, click the Share Video button from the top command bar to toggle it off.
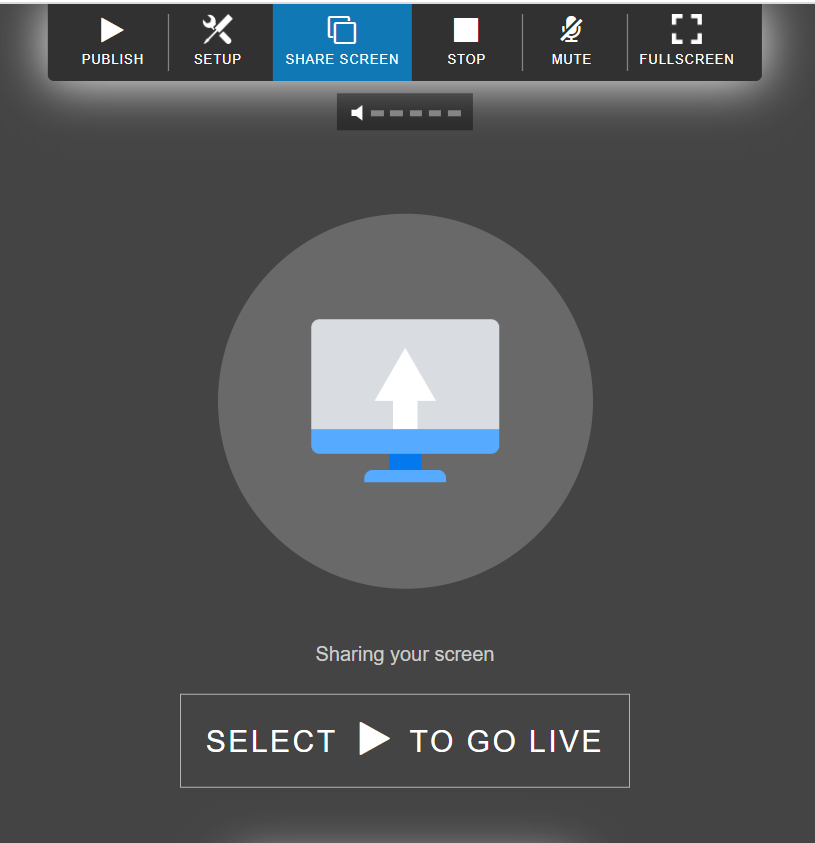
Live Share Your Computer Screen
The virtual stage also allows you to share your entire computer screen, or a program or a browser tab into your live-stream feed. To use this feature, follow the steps below:
- First enter the presentation stage by clicking Test ➜ Present (in the test mode) or Connect ➜ Present (in the production mode).
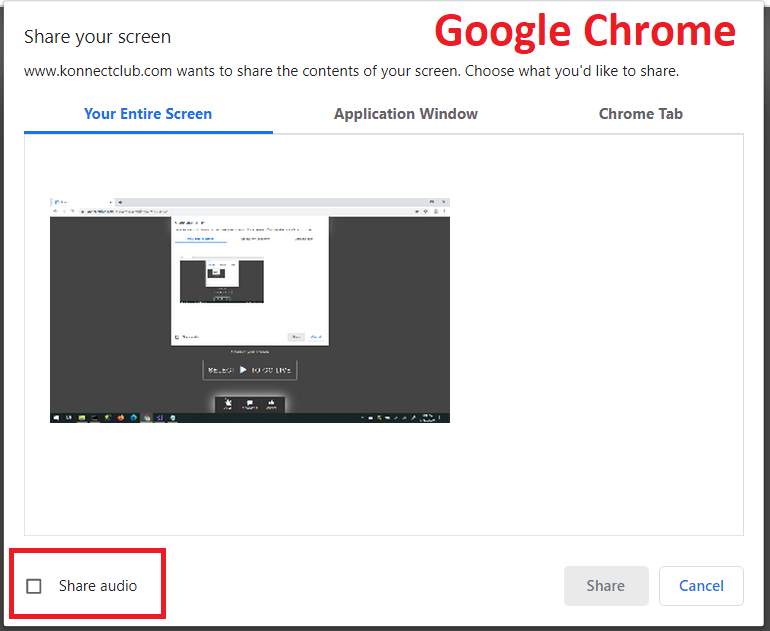
- Then click the Share Screen button from the top command bar. You will see a prompt presented by your browser to select the desired application or the entire screen.
- You can select an additional option to include audio, if your browser supports sharing screen audio (currently supported only in Google Chrome on Windows and macOS).
- Click the Setup button from the top command bar to tune your audio quality, or select the audio from another audio input device.