OBS Studio is a popular live-streaming software used for mixing multiple camera feeds, dynamic scene transitions, filters and many other functionalities. You can use OBS Studio with Konnectclub live streaming as described below. Please select one of the options depending on your chosen streaming mode.
Configure Settings
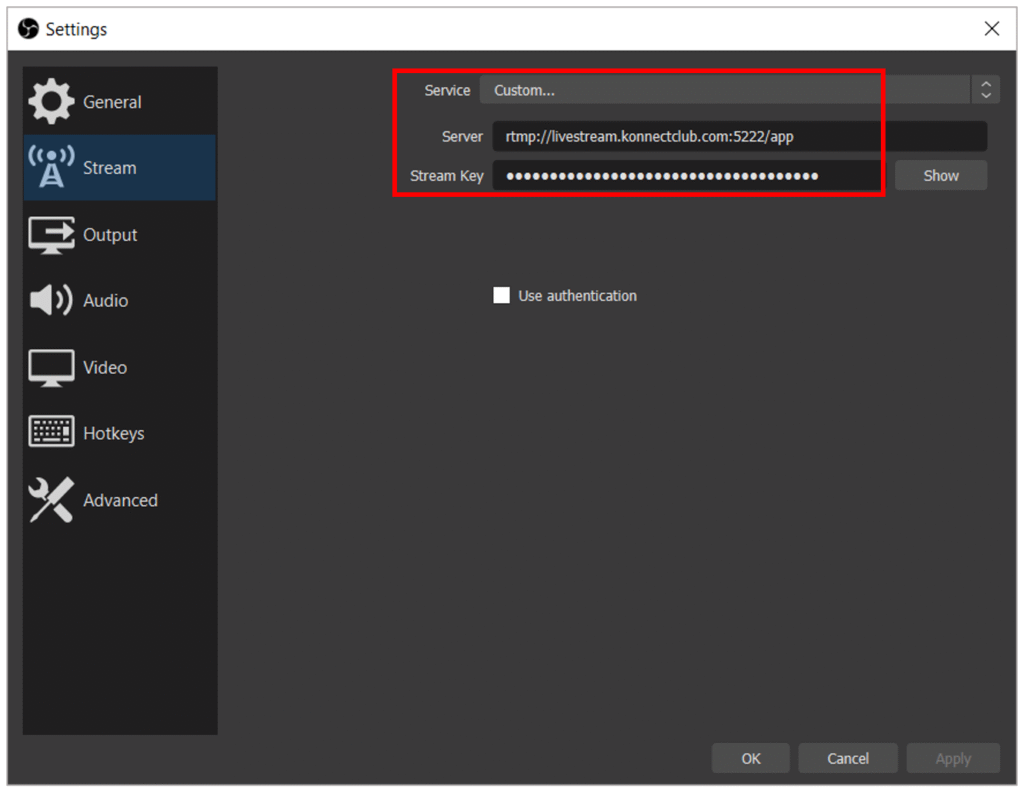
Using OBS Studio with the Konnectclub RTMP streaming mode is quite straightforward. Copy your stream key and the server URL from the stream settings as described in the related article. In the OBS Settings screen, under the Stream section, select Custom as the Service type, and then paste your server URL and stream key respectively. Make sure that Use Authentication is unchecked.
For each event you receive a Production Stream Key which is different than the Test Stream Key. The former is only to be used during the live event, while the latter is meant for private testing of your setup before the event.
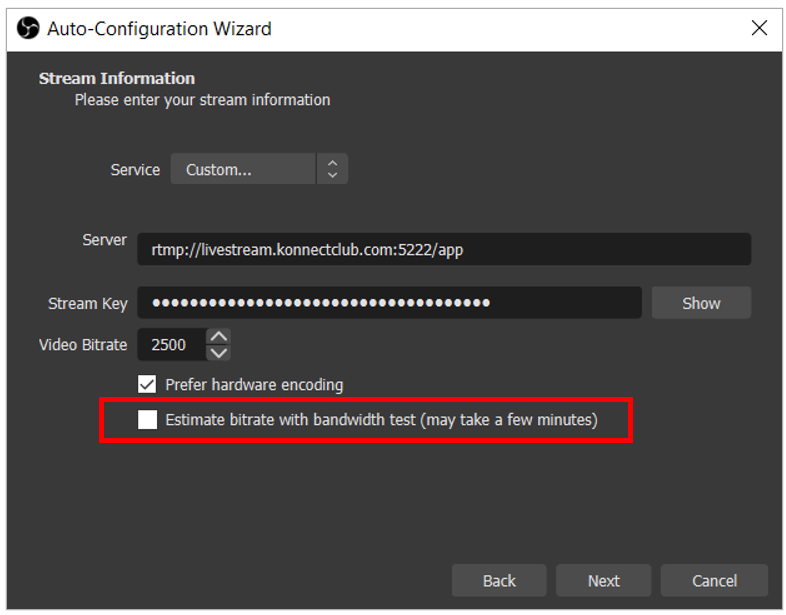
We recommend creating separate OBS Profiles for the test mode and production mode. You can use the Auto Configuration Wizard in OBS Studio to create a profile by clicking Profile ➜ New. Make sure to uncheck the bitrate estimation option.
- Use Google Chrome browser on both Windows and macOS for this purpose
- Setup your OBS scenes as usual. Only add Video inputs, do not route your audio through OBS.
- Install a virtual camera driver for OBS, follow the instructions specific to your operating system
- Go to OBS Studio, select Preferences -> Video and select 1280 X 720 as the resolution for both Base (canvas) and Output (Scaled).
- Select Tools -> Start Virtual Camera in the main OBS Studio window to start the virtual camera output.
- Go to the Setup option in your Konnectclub Live-stream Stage and select OBS Virtual Camera as the Video Source. Make sure that the Video Resolution is set to 1280 X 720.

- Select your desired Audio Source directly from the Setup option
There are two options for connecting your audio when you are using OBS:
- Direct: If you have a single audio-source (e.g. your audio mixer), then you could just select that as the audio-source in Konnectclub. In this simplified set-up, the audio is not going via OBS and thus maybe slightly out of sync with the video produced by the OBS. If you notice this sync issue and would like to address it, please consider the next option.
- Routed: In this mode, you can route your audio via OBS Studio and use a virtual audio driver (see instructions below) to pipe it into Konnectclub. While slightly technically complicated, this approach can have two benefits – (1) you can mix multiple audio sources in your OBS scene, (2) you can adjust the sync offset between video and audio as desired.
Routed audio instructions:
Please make sure to follow each step accurately. If you do not get an expected result in the end, please double check all your settings in each step and verify that they are correct. This set up has been tested on both Windows and Mac computers with the OBS Studio v26.1+ and current version of VB cable.
- Install a virtual audio routing interface in your computer, such as VB Cable
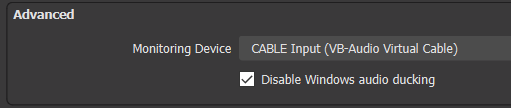
- Inside OBS Studio, go to File -> Settings -> Audio -> Advanced -> Monitoring Device and set it to virtual audio cable input (actual name may vary on your system)
- Next, go to Edit -> Advanced Audio Properties and make sure that each of your audio source has the “Audio Monitoring” set to “Monitor Only” or “Monitor and Output”

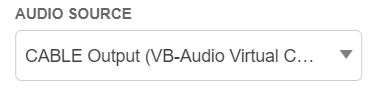
- On Konnectclub Setup option, select virtual audio cable output as your audio source (note: the actual name on your computer may differ from the screenshot below).
Adjusting live audio sync offset:
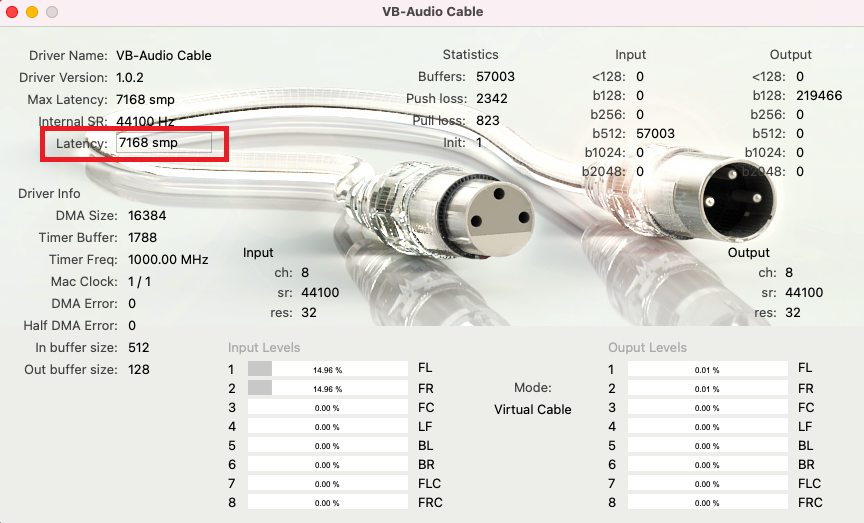
Any sync offset settings inside OBS will not have any effect on the real-time audio set up described here. In order to add add any sync offset, you would need to use the setting of the virtual audio driver you are using. We recommended using VB Cable, as we described above. Inside VB cable control panel, you can set the Latency parameter (highlighted in the screenshot below). Note that the latency is described in number of samples (smp). If your sample rate is F KHz, then your offset will be n/F milliseconds, where “n” is the number in smp that you set in the Latency setting. For example, with a 44.1 KHz sample rate, a setting of 7168 smp would offer a 7168/44.1 = 162.5 ms of audio offset. To get higher amount of offset, you would need to set the Latency parameter to a higher number. Note that you may also need to increase the “Max Latency” value from the Options menu in order to set a higher Latency value.
Troubleshoot “Choppy” Streaming
There are several technical factors which can cause your stream to appear choppy, or intermittently pausing. We highly recommend that you test your setup ahead of time in order to troubleshoot any setup issues.
- Unreliable network – this is a common reason behind unpredictable streaming performance. We DO NOT recommend using a Wifi connection from your streaming computer. Make sure to connect your computer to a wall port via an ethernet cable. Also, make sure the network connection is not being used for any other high-load activity at the same time.
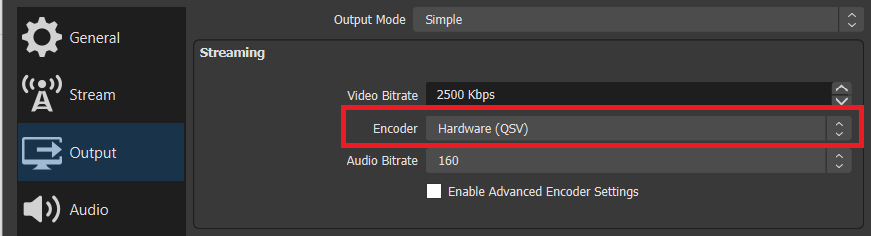
- Hardware acceleration – make sure that your OBS settings is set up to use your computer’s GPU card. To check this, go to Settings ➜ Output. Encoder should be set to Hardware.
- Hardware performance– during the streaming, make sure that the GPU performance of your computer is not peaking (consistently 80% or more). Ideally, the GPU utilization should stay below 50%. If this is not being achieved, please use a different computer with higher specs, or use a lower resolution.
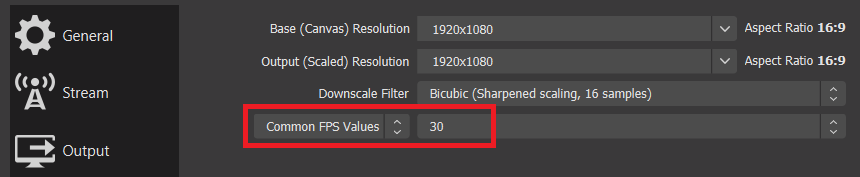
- Resolution & framerate – Make sure that your framerate is set to 30 (under Settings ➜ Video). If you are using 1080p output resolution, you can also lower the output resolution to 720p to reduce processing overhead on your computer.